Bonus Kid Kore repaint from when I did Tennant. I basically had just been testing all my strokes/colors on her, so when I was done with Tennant I felt bad and gave her a ~30 minute repaint using the colors I had on the palette. Could be a lot better, but, ::shrugs::

I like this face mold and her huge hair, though. I stuck her on a handless EAH body because apparently the ball at the top of that neck is close enough to the ball-joint neck she originally had to work. The neck looks hilariously thin, but it kind of did on her original body too.

Finished up Tennant-doll for now! First two photos are him finished, third is the WIP where I left off (although I’d glued his hair down between that and the last time I posted him), and the fourth is his original repaint from… 2010, whoa. I still think it’s pretty funny to be painting a doll to match a character that was based on the doll in the first place, but, either way, I think it’s an improvement!

I got some Golden Fluid Acryllics for my birthday, which I used to finish this repaint, and they are awesome. Passable out of the bottle, and mixed one drop paint to one drop water, they actually feel a lot like using a pencil – a light, even line that dries super quickly. I also love the little dropper bottles, I don’t feel like I’ve wasted a ton dropping the colors onto the palette.

As for the paint job itself, I mostly tried to soften up and even out the eyes. I didn’t like the look/color of the brows I’d blocked in before, so I wiped them and started again. Whatever mix of paints I’d used, it was apparently terrible because it stained the area yellow despite only being there for like two weeks.

I also tried to cover up all the stress marks from prying open the torso with some bruises, but in my attempt to actually get the paint to stick to the slick plastic I definitely overdid it. For now i’s fine though, since I don’t leave him sitting around shirtless, heh.

Also, can I just say that this face mold looks 10 times better with the hair slicked back like that? It’s also smirking, which I hadn’t really noticed.

Sculpt-y project, I dremmelled up a broken Moxie Teenz body I had wondering how much I could push the range of motion. Apparently, quite a bit! I like the size and proportions of this body so I thought I’d try using it as a base to sculpt on. I chopped off the hands and chest, strung up the neck so I could actually put a head on it, and substituted a Liv head as a base cause I much prefer the proportions of it.

For surfacing I thought I’d be clever and mix some paint with my white gesso to match the skin tone. I got a pretty good match, but, alas, the paint mixed in totally ruins the sandability of the gesso. I might still use this for my final layer, though. It’s durable and feels nice.

Another (slightly older) WIP dolly, hodgepodge OC Myr! The body was a Monster High Howleen and the head was a very discolored Disney Store Elsa. I tried @oak23‘s method of dyeing the parts with iPoly. Uhh, the dye was working really well on test pieces, but the steam from the pot started coloring my stove hood before I could put the parts I actually wanted to dye in – lesson learned there. I took the pot off the stove, then decided to go for broke and toss the parts into the warm water. I used a tiny amount of black dye going for grey but they still came out really dark in a short amount of time (except for the lower legs and joint pin parts). If I did this again I’d definitely not use a color I wanted a weak tint of – it dyes too well! I think the color would be very even if I could’ve left the parts to sit. 

In the end I did paint over most of the body and all of the head for consistency, but the dyed color is extremely close so I’m not so worried about chipping. The color is darker than I really wanted (it looks lighter in the photo, there isn’t as much contrast in the stripe in real life) but it still looks pretty good I think. 

They still need hair, ears and antennae, but it turns out I don’t have any golden-blonde hair, somehow. 

PS: Painting yellow scleras on black is awful. 

Before and WIP after plus a character drawing for comparison.

Remember when I painted doll-Tennant originally and my concept was just that I wanted him to be a nicer guy than my other characters? HAHAHA. Anyway, I’d fallen very much out of love with his repaint, so, time to do him over. It ended up being way too late to finish his face in one sitting so here’s a WIP with eyes + rough brows + slapdash pastels so he doesn’t look nakedfaced (these fade like hell without sealing so I wasn’t fussy).

Mostly I can tell that my style has become very very different over the years! It pretty much matches the way I digitally paint eyes now which is… predictable. I think I want to paint some more soft in-betweens in there though, they just look like solid cartoon eyes unless you’re right on top of them and the light’s bright enough to differentiate the brown and black (which it only is under my painting lamp). On the bright side, look how I was patient enough to get a nice smooth white this time!

I haven’t done it at all lately, but seeing recent and nostalgic stuff from @oak23 and @dollsahoy has given me a serious itch to start doing/posting some more dolly stuff lately. (Just, like, with lower production values from somebody with less free time who’s too lazy to set up photo backdrops now.) I know this has been a drawing-only blog forever, so if this bothers you I can always move to a side blog. 

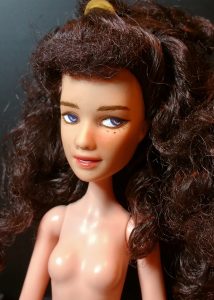
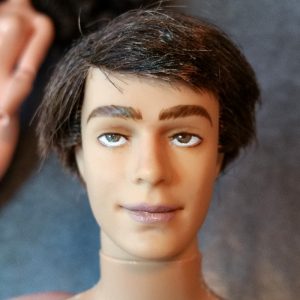
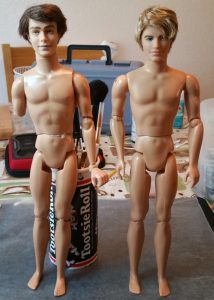
Anyway! My main project I’ve wanted to do for a while was improving my OC dolls (shocker). M characters based on dolls no longer look that much like the dolls, which is weird but okay. Tennant here is definitely the most strongly linked to the doll but he really needed a body upgrade because I hate the awful shoulders on the 1999 poser Kens, plus I wanted a wrist on him. I thought about changing him out to the newer Fashionista Ken body with a hip mod but I only have two and felt kind of bad about chopping an arm off a perfectly good one. I saw the shoulder mod @dolljunk did on one though so I thought, hey, I’d try it out on his original, already-broken body and worst case scenario, I don’t like it and do the new Fashionista. 

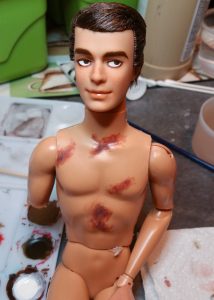
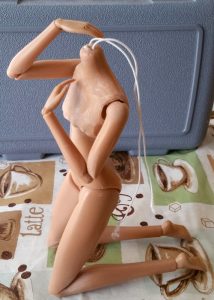
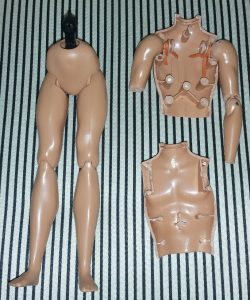
So, this was the result. Cracking the torso open took 80% of the time and was awful. I don’t know what kind of glue is in there, but all but ONE peg broke clean off instead of coming unglued ever. Half the outer seam just had to be dremelled open, so his sides are a mess now. Thanks, Tennant. I also chopped off the hand and drilled in a Dragon one, which was super easy (although only like 2 out of my big eBay lot of action figure hands were even close to a color match), and tried dremmelling the elbow joint, which made no apparent difference in posability. (I tried.)

The shoulders were pretty easy. I expected to have to make new shoulder wells but I didn’t. I just dremmelled out the outer part of the shoulders and put the arms back in deeper. The leather twine (which is just what I had on hand) makes it a tight fit that can hold poses. 

In the end I added some hot glue sueding to the shoulder and torso joint which made it even uglier but works fine. I’d like to pretty the rough edges up sometime (and I made a mess of some things I didn’t have to, like the left arm, oops) but for now he looks way better in clothes than he did before. 

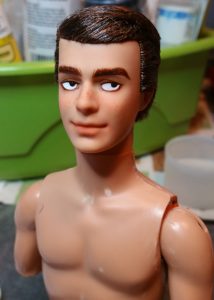
Re-repaint coming up next.